

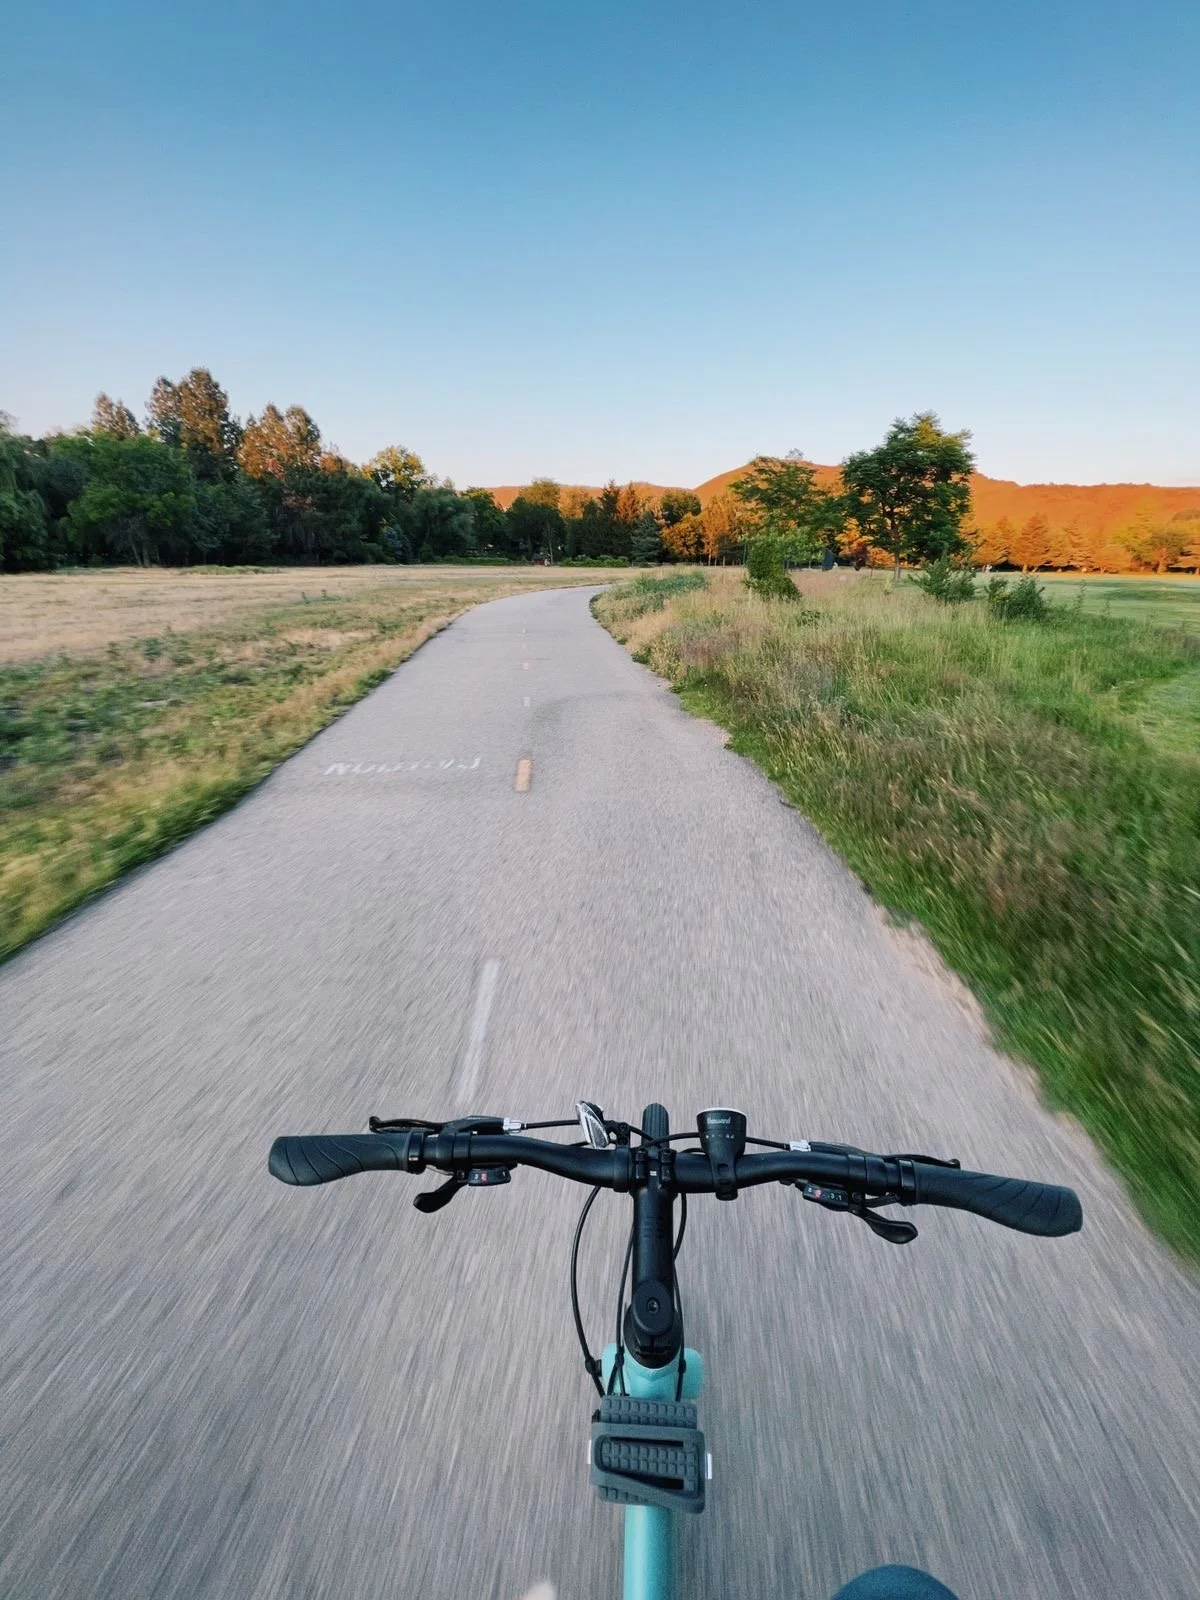
Running, Cycling, and Your Pelvic Floor
If you run, cycle, or do both, your pelvic floor is working harder than you probably realize. And yet, it’s one of the most overlooked pieces of the puzzle when it comes to performance, comfort, and long-term resilience.
Whether you’ve experienced symptoms like leaking, heaviness, or discomfort, or you’re simply trying to prevent future issues, understanding how these sports impact your pelvic floor can make a huge difference.
The goal isn’t to stop doing what you love. It’s to make sure your body is fully supported while you do it!
Why the Pelvic Floor Matters More Than You Think
Your pelvic floor is a foundational part of your core system. It works together with your diaphragm, deep abdominal muscles, and hips to:
Manage pressure
Support your organs
Transfer force efficiently
Create stability during movement
When everything is working well, this system adapts to the demands of running and cycling. However, when it’s not working well, that’s when symptoms such as leaking, heaviness, and pain start to appear. It’s important to note that those symptoms aren’t random. They’re your body’s way of telling you your pelvic floor requires a little extra support and attention!
Running vs. Cycling: Two Very Different Demands
Before we talk about solutions, it helps to understand that running and cycling challenge the pelvic floor in completely different ways.
Running: Repetitive Impact & Pressure Management
Running places repeated impact forces through your body as your foot strikes the ground with every step. These forces are often 2–3x your body weight every single step!
With this impact, your pelvic floor has to:
Absorb and respond to that impact
Coordinate with your breath
Manage spikes in intra-abdominal pressure
If that system gets overwhelmed, you might notice urinary leakage, feelings of heaviness or pressure, or even pain in the pelvis or hips. These symptoms don’t mean something is “wrong”; it just means your system doesn’t yet have the capacity to handle the load being asked of it.
Cycling: Sustained Pressure & Positioning
Cycling is lower impact, but that doesn’t mean it’s easier on the pelvic floor. Instead, the challenge is prolonged pressure and positioning.
On the bike, your pelvic floor is dealing with:
Direct contact with the saddle
Forward-leaning posture and pressure on the perineum
Limited movement variability while in the saddle
These pelvic floor demands can lead to pelvic discomfort or pain, soft tissue irritation, numbness/tingling in the perineum, and in some cases, labial/perineal swelling. In this case, it’s less about impact tolerance and more about pressure distribution and mechanical setup.
3 Key Exercises to Support Running
If you’re running (or want to return to running), these movements help build the foundation your pelvic floor needs to handle impact.
Coordinated Breathing with Core Engagement
Why it matters:
This is the foundation of pressure management to combat issues like pelvic heaviness, pressure, and leaking while running. Your diaphragm and pelvic floor move together. If they’re not coordinated, pressure management becomes inefficient. Think of this as building the timing and coordination system for everything else.
How to do it:
Inhale: allow your ribcage to expand in all directions (forward/back and side to side). As you inhale, your pelvic floor should gently relax
Exhale: gently engage your lower abdominals and pelvic floor. It is helpful to imagine you are “closing a zipper from your pubic bone to your naval”, while simultaneously “picking up a blueberry with your labia” as you exhale (these seem like silly cues, but they work!)
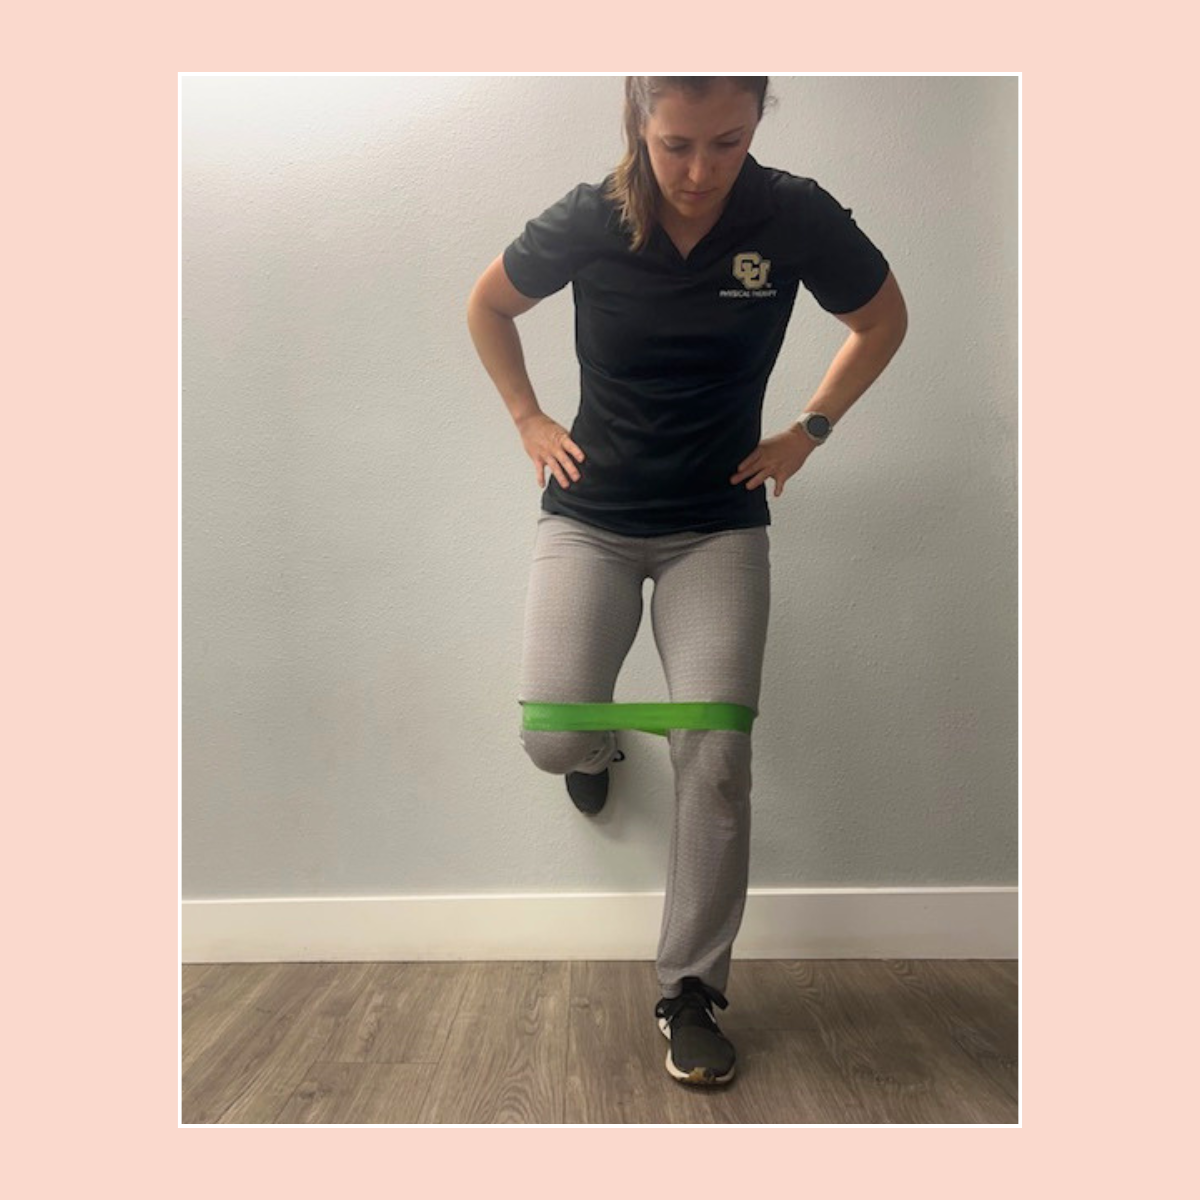
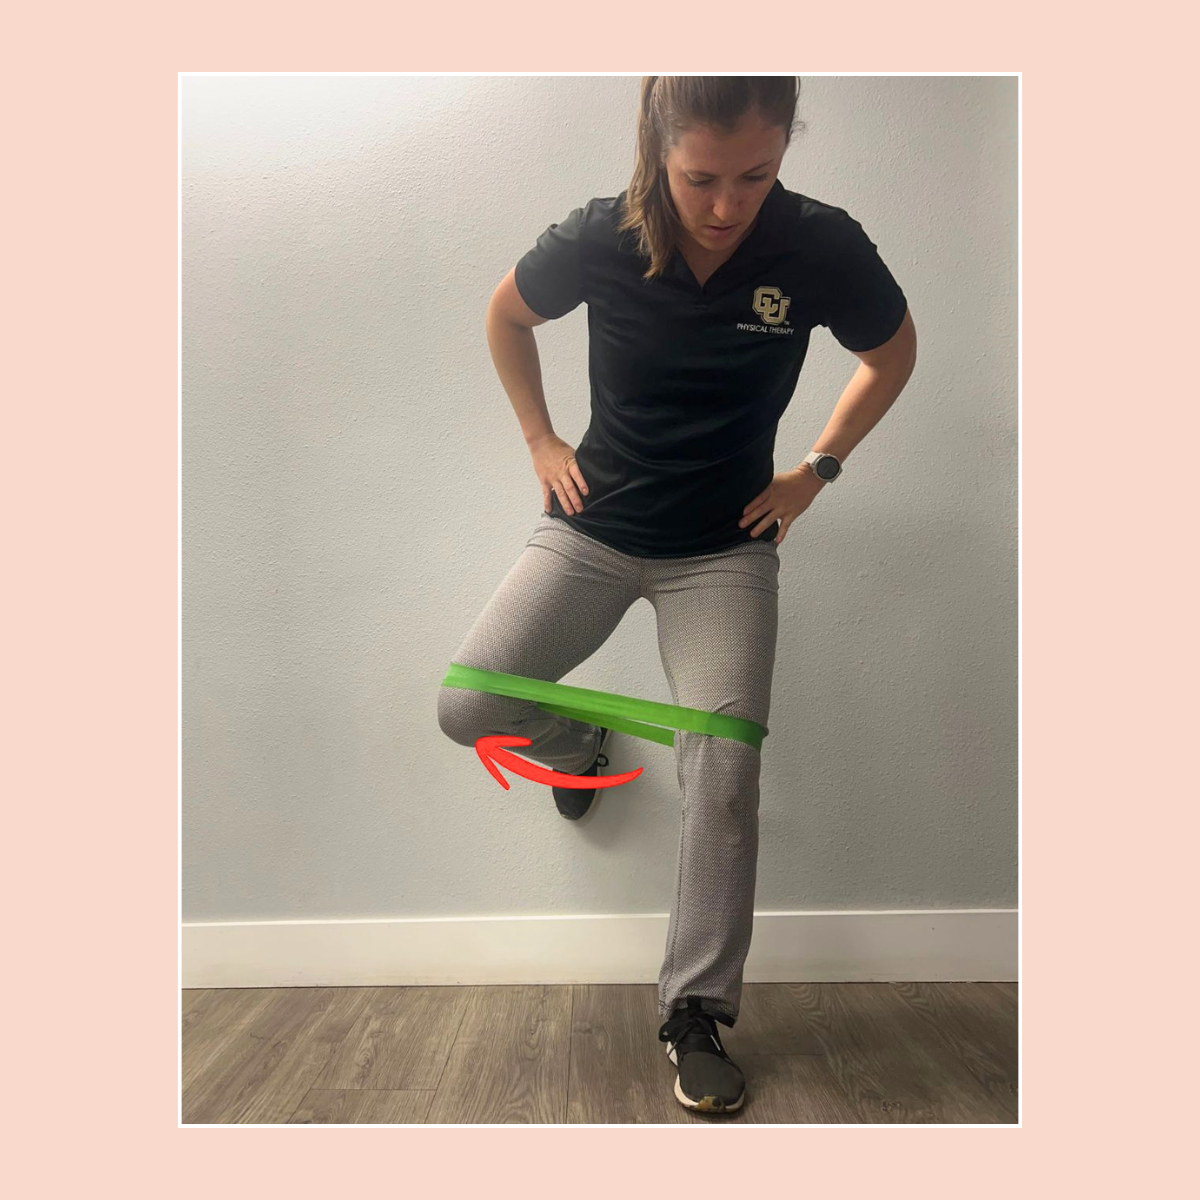
Single-Leg Strength with Wall Clamshells
Why it matters:
Running is essentially a series of single-leg hops all strung together. Strong hips reduce the load your pelvic floor has to absorb.
How to do it:
Place a small loop band around both of your legs, just above where your knee bends
Stand on one leg with the sole of your opposite foot on a wall behind you (this is for balance only)
With your standing leg, start with a slight bend in the knee. Then, shift your hips back and drop your chest down slightly (like a mini-single leg deadlift position). This is your starting position.
From there, your standing leg stays still and the bent knee presses out into the band like a clamshell
As the band stretches, it is going to try and pull your knee in, so your job is to prevent that from happening
You should feel this exercise mainly working the glute of the standing leg
As you do this exercise, focus on:Knee tracking over toes without diving in
Keeping a stable pelvis (no excessive dropping or shifting)
Controlled movement, not speed
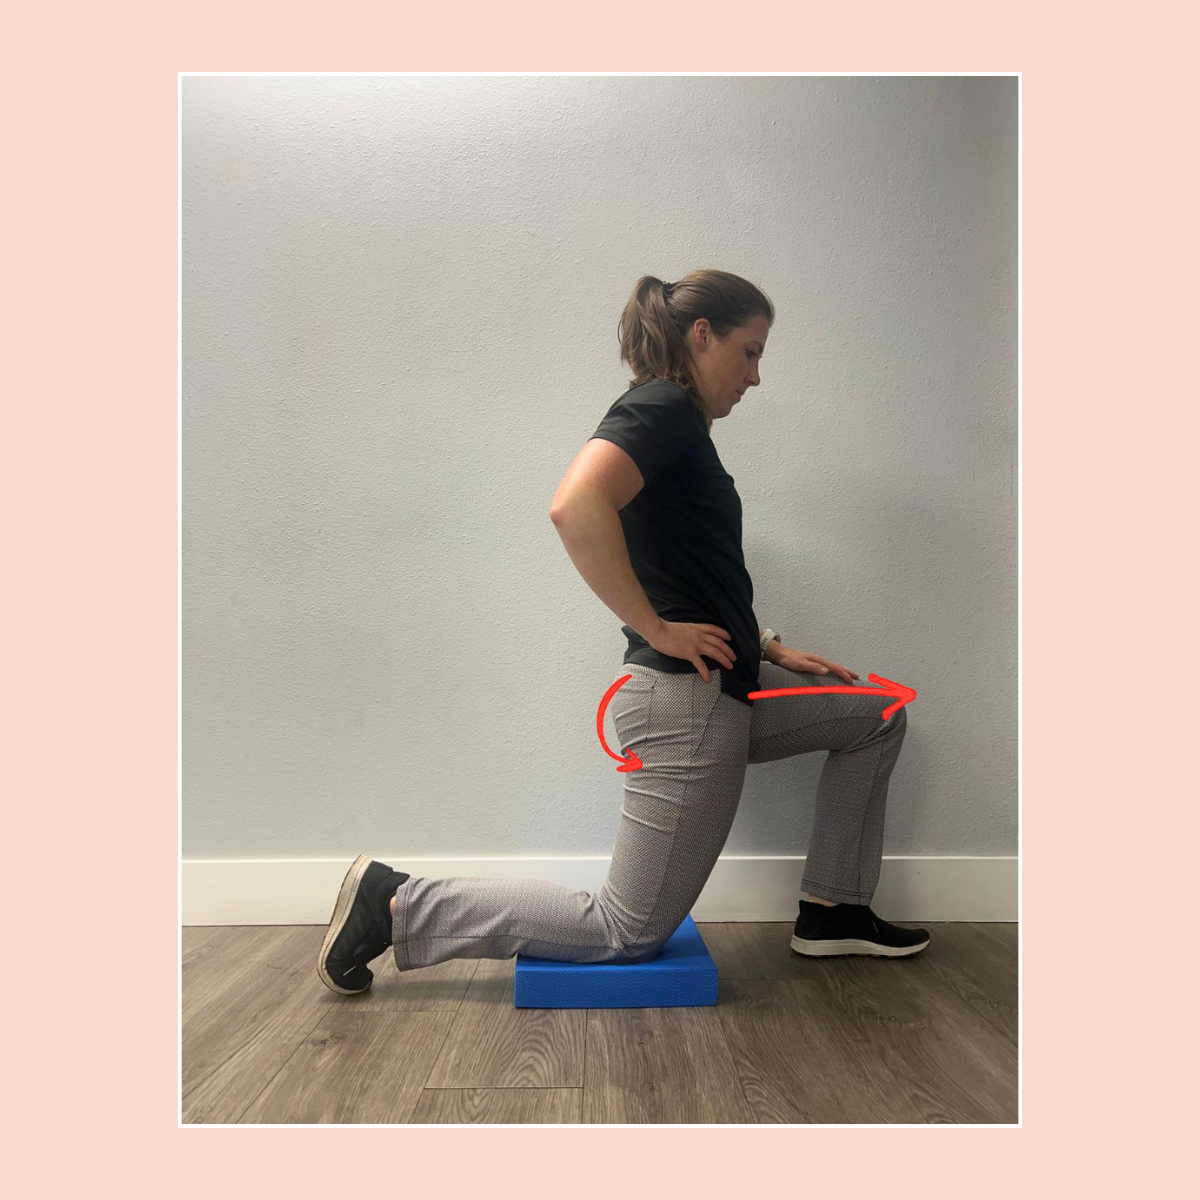
Hip Flexor Stretching
Why it matters:
When you run, with each step your thigh must move behind the plane of your body. If you do not have enough length in your hip flexors to allow this to happen, you will experience more pelvic movement than is typically required. This results in more demand on the pelvic floor.
How to do it:
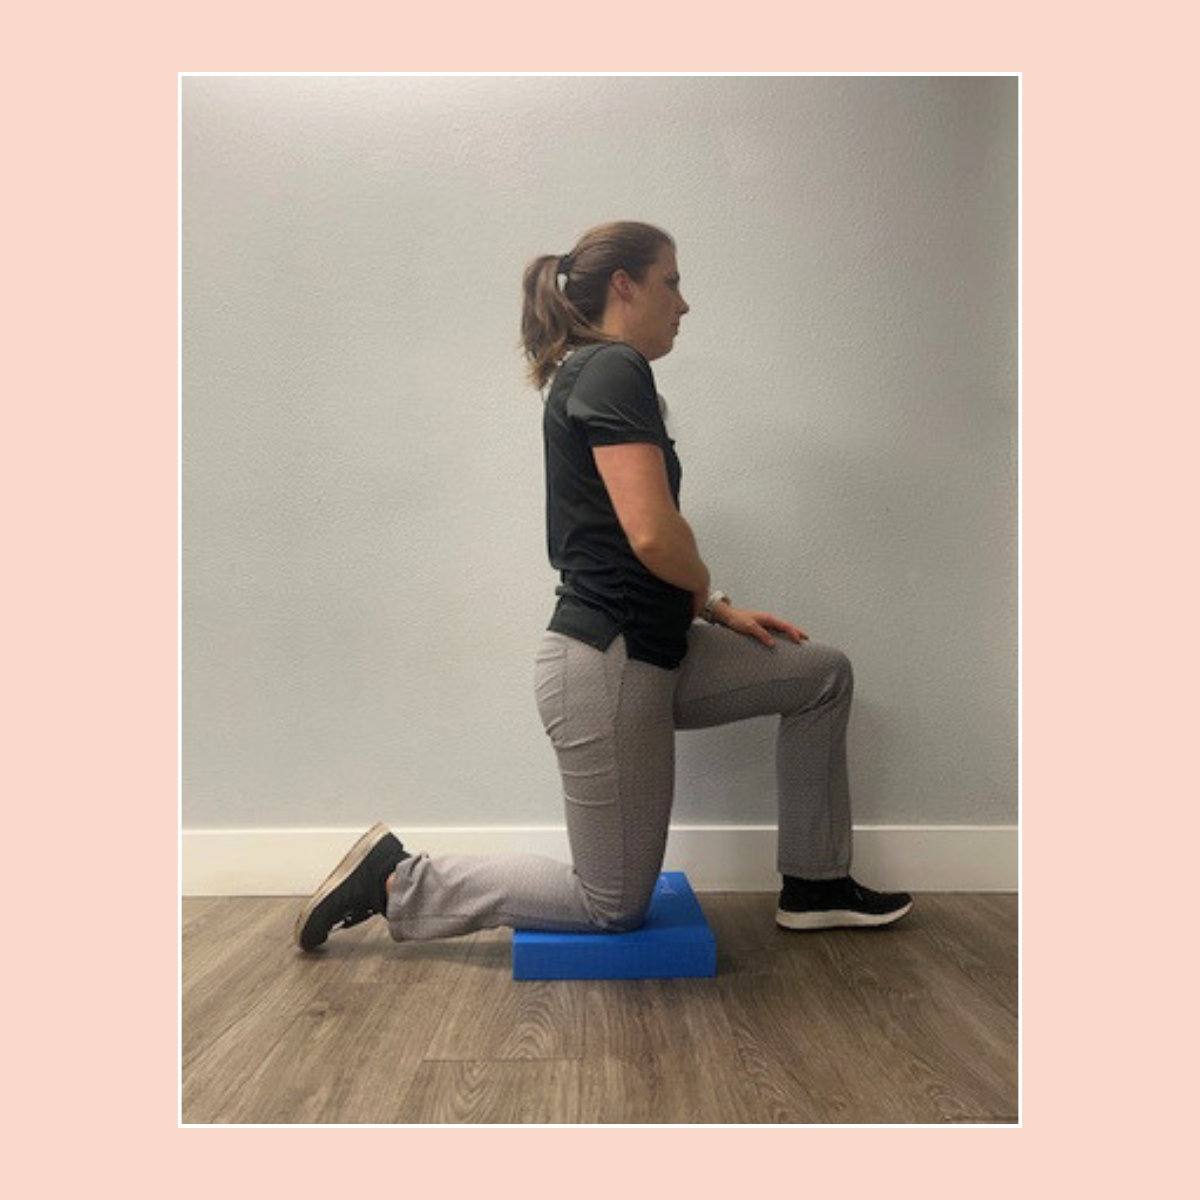
Kneel down on one knee
“Tuck your tail” and drive your hips forward, keeping your tail tucked and your trunk upright
You should feel a stretch in the front of your hip as you do this
Cycling: Positioning, Pressure, and Comfort
For cycling, the focus shifts from exercise to setup and strategy. Here are a few tips to keep you comfortable in the saddle for those longer or more demanding rides:
Saddle fit and position
A poorly fitted saddle can increase pressure directly on sensitive structures.
Things to consider:
Saddle width that matches your anatomy - for example, if you have narrow sit bones, too wide of a saddle can place pressure in the wrong places. Alternatively, if you have wider sit bones, too narrow of a saddle might create too much pressure on the perineum
Cutout vs. non-cutout depending on symptoms - While central cutouts do alleviate midline pressure, they can occasionally create more localized pressure along the edges of the cutout. This is tolerated better by some people than others. Saddles with no cut-out have less localized pressure, but don’t provide as much midline pressure relief. Again, different people have different tolerances to these saddle features
Tilt - If the saddle is tilted too far forward (nose down) or too far back (nose up), the pressure distribution between your pelvis and the saddle can change
Posture in the saddle
Saddle posture isn’t just about protecting your back. Your trunk position influences how pressure is distributed through the bony parts of the pelvis.
Aim for:
Balanced weight between hands, sit bones, and feet
Avoid collapsing heavily into the saddle
Avoid placing too much weight in your hands (your hands and wrists shouldn’t be going numb when you ride!)
You should feel pressure distribution throughout your entire bony pelvis, not just the sit bones
Changing positions
The most efficient position on the bike is one where your weight is supported through the bony parts of your pelvis, not just your sit bones in isolation.
But in reality, many cyclists tend to ride with their pelvis tucked under and their back rounded, especially during climbs or hard efforts. You might recognize this as a “tail tucked” position.
This is problematic because it shifts more pressure into the soft tissues of the pelvic floor and perineum instead of the structures designed to bear load.
If you catch yourself here, avoid just rolling your pelvis forward while still seated.
Instead, try this:
Stand up out of the saddle to fully unload the area
Reset your posture by flattening your back and gently “sticking your tail in the air”
Sit straight back down onto the saddle without changing that pelvic position
This small reset matters more than it seems. By fully de-weighting the perineum before repositioning, you reduce unnecessary shearing forces through the pelvic floor and soft tissues, helping improve comfort and reduce irritation over time.
If You’re Already Having Symptoms…
Symptoms like leaking, heaviness, or discomfort don’t mean you have to stop running or cycling. They’re a signal that your body needs more support, whether that be through increasing capacity for repetitive loading, improving coordination, or optimizing load management and pressure distribution.
The good news is, these things are trainable! With the right approach, many people return to their sport feeling stronger and more confident than before.
If this resonates with you, whether you’re trying to stay ahead of issues or you’re already noticing symptoms, you don’t have to figure it out on your own. If you would like more tailored guidance from one of our physical therapists, we offer complimentary 30-minute discovery visits where we can talk through what’s going on and what the next best step might look like for you!